
The Dutch Baby Pancake is a delightful blend of simplicity and elegance that brings joy to any breakfast table.
Its crispy edges and soft, custardy center create a perfect contrast that makes it irresistible.
I first encountered this marvel during a cozy brunch with friends, where its towering puff and golden hue stole the show.
This dish is as versatile as it is impressive, perfect for both a leisurely weekend breakfast and a sophisticated brunch.
Prepare to be amazed by how easy it is to create this stunner with just a few simple ingredients.
The History and Cultural Significance
• Dutch Baby Pancake traces its origins to early 20th-century America, where it was originally created by German immigrants.
• The dish evolved over decades as chefs experimented with different batter ratios, eventually becoming the beloved version we know today.
• In American culture, this dish traditionally appears at breakfast and brunch gatherings, symbolizing warmth and hospitality.
• While many variations exist across different regions, the authentic version maintains a high, puffed appearance that sets it apart from imitations.


Recipe Overview
Nutritional Information (per serving)


Essential Equipment Guide
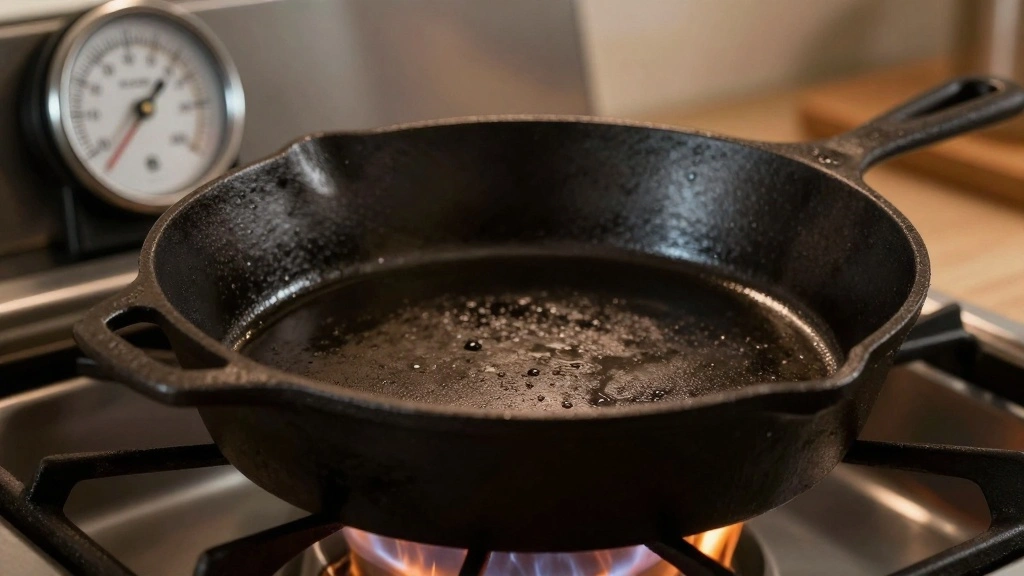
Cast Iron Skillet: A cast iron skillet is essential for achieving the authentic rise and even browning of a Dutch Baby Pancake. Its ability to retain heat ensures that the pancake puffs up beautifully. Alternatives like non-stick pans may work, but they might not provide the same crisp edges. Look for a skillet that is well-seasoned and has a smooth cooking surface.
Blender: Using a blender guarantees a smooth, lump-free batter that is crucial for the airy texture of the pancake. While hand mixing can work, it may not achieve the same consistency. Choose a blender with variable speeds and a sturdy blade.
Oven Mitts: Given the high temperatures involved, oven mitts protect your hands when handling the hot skillet. Alternatives include thick kitchen towels, but ensure they are heat-resistant. Choose mitts with good grip and heat insulation.


Ingredients
For the Batter
|
| Amount | Ingredient | Notes |
|---|---|---|
| 3 large | eggs | room temperature, ensures better rise |
| 1/2 cup | all-purpose flour | sifted for light texture |
| 1/2 cup | whole milk | room temperature, adds richness |
| 1 tablespoon | sugar | balances flavor |
| 1 teaspoon | vanilla extract | adds aroma |
| 1/4 teaspoon | salt | enhances flavor |
For the Skillet
| Amount | Ingredient | Notes |
|---|---|---|
| 2 tablespoons | unsalted butter | melted, for greasing |


Preparation Methods
Room Temperature Ingredients: Ensuring ingredients like eggs and milk are at room temperature helps the batter blend more smoothly and rise evenly. Cold ingredients can shock the batter and inhibit proper puffing. To master this, take ingredients out of the fridge at least 30 minutes before starting.
Preheating the Skillet: Preheating the skillet in the oven ensures that the batter begins cooking immediately upon contact, which is essential for the pancake to rise. Always place the skillet in the oven while it preheats to achieve this effect.
Blending the Batter: Blending the batter until smooth and bubbly incorporates air, which contributes to the pancake’s rise. Over-blending can deflate the batter, so aim for a quick blend of 15-20 seconds.


Step 1: Prepare the Oven and Skillet
Preheat the oven to 425°F (220°C).
Place the cast iron skillet in the oven as it preheats.
This ensures the skillet is hot and ready for the batter, which helps in achieving a good rise.
Keep the skillet in the oven for at least 10 minutes.


Step 2: Blend the Batter
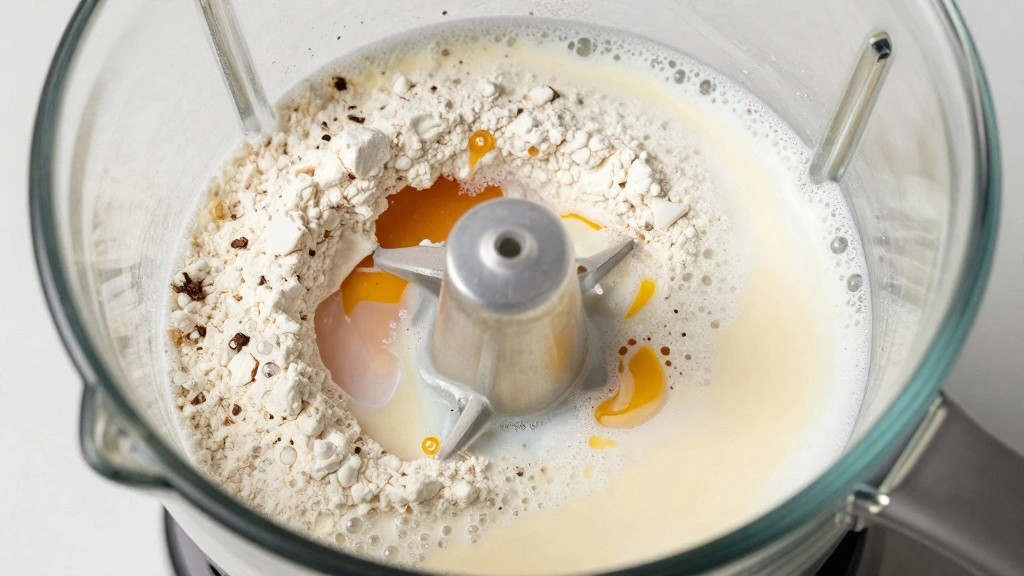
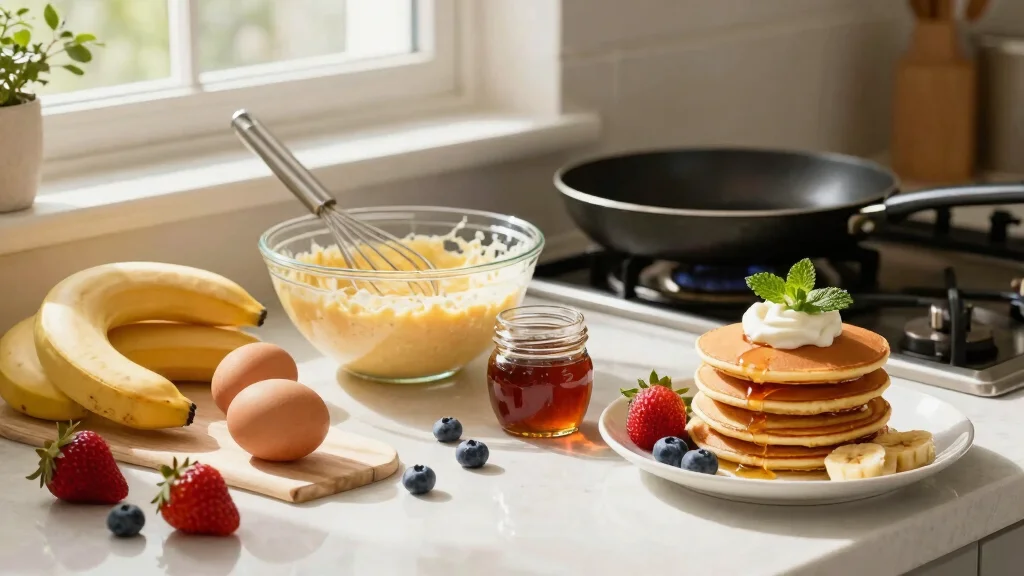
Crack the eggs into a blender.
Add the flour, milk, sugar, vanilla extract, and salt.
Blend on medium speed until smooth and slightly bubbly, about 15-20 seconds.
Avoid over-blending to prevent deflating the batter.


Step 3: Melt the Butter
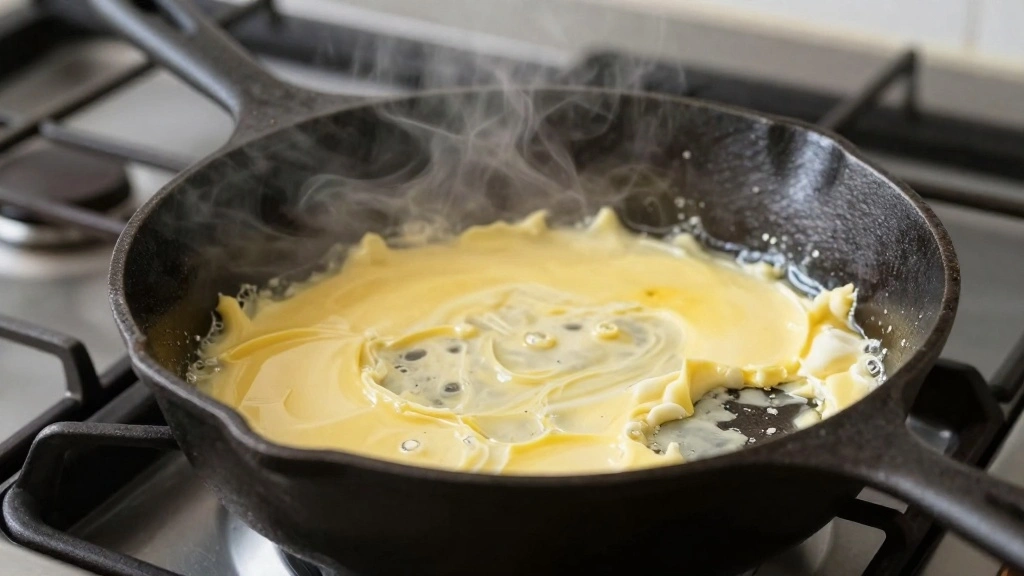
Remove the hot skillet from the oven using oven mitts.
Add the butter to the skillet, swirling to coat the bottom and sides.
The butter should sizzle and melt quickly, covering the entire surface.
Ensure there are no dry spots left in the skillet.


Step 4: Pour the Batter
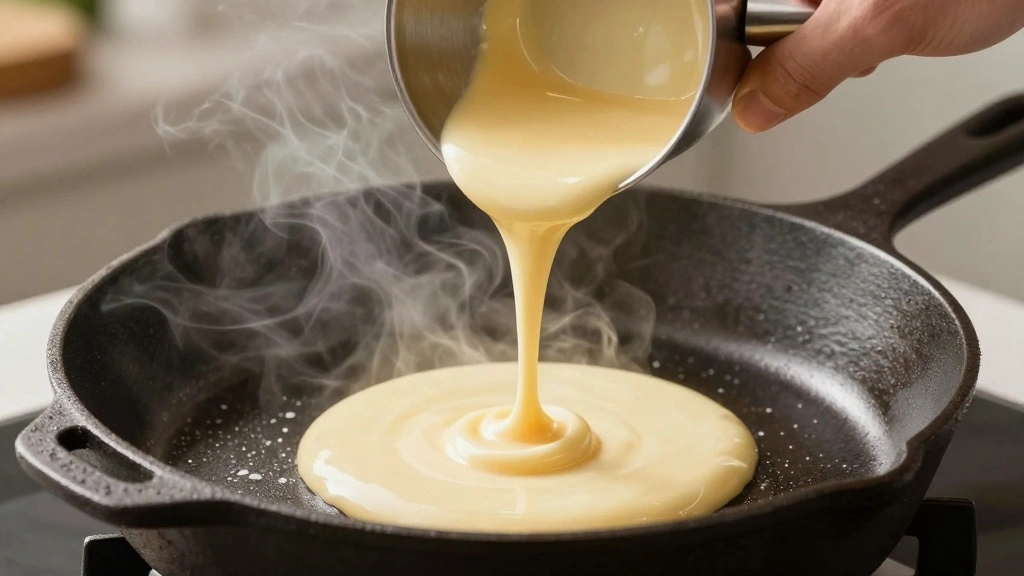
Carefully pour the prepared batter into the hot, buttered skillet.
The batter should sizzle upon contact, indicating the skillet is hot enough.
Ensure an even distribution of batter across the skillet.
Work quickly to maintain the skillet's temperature.
Step 5: Bake the Pancake
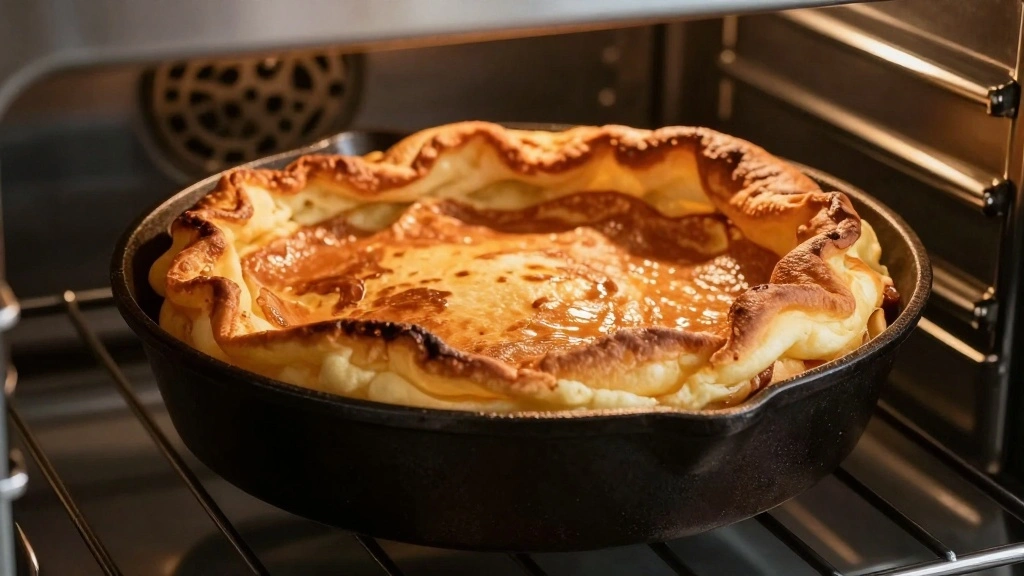
Place the skillet back in the oven.
Bake for 20 minutes without opening the oven door.
The pancake should puff up and turn golden brown.
Resist the urge to peek to prevent the pancake from deflating.


Step 6: Remove from Oven
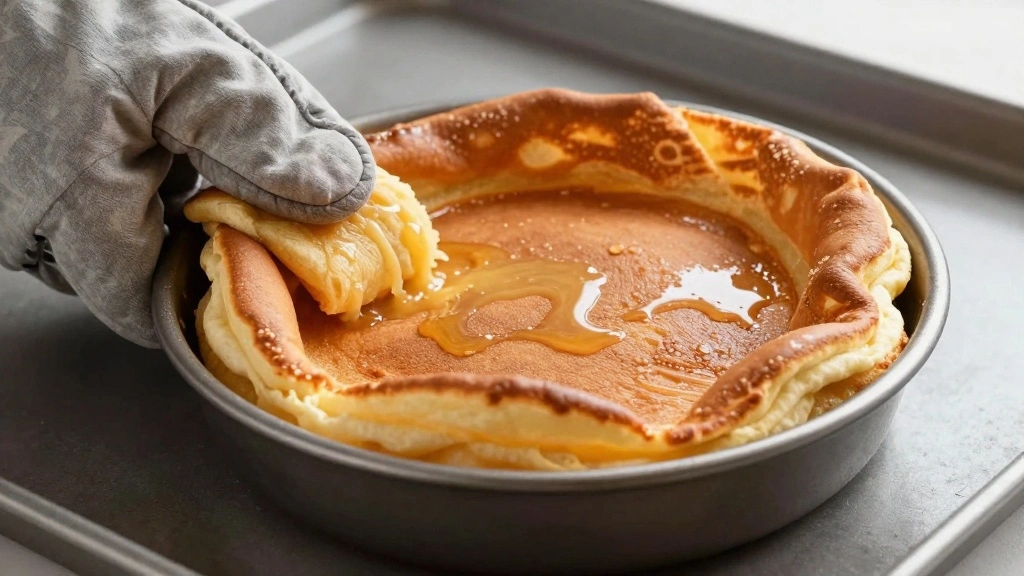
After 20 minutes, remove the skillet from the oven using oven mitts.
The pancake should be puffed and golden with crisp edges.
Place the skillet on a heat-proof surface to cool slightly.
The pancake will deflate slightly as it cools, which is normal.
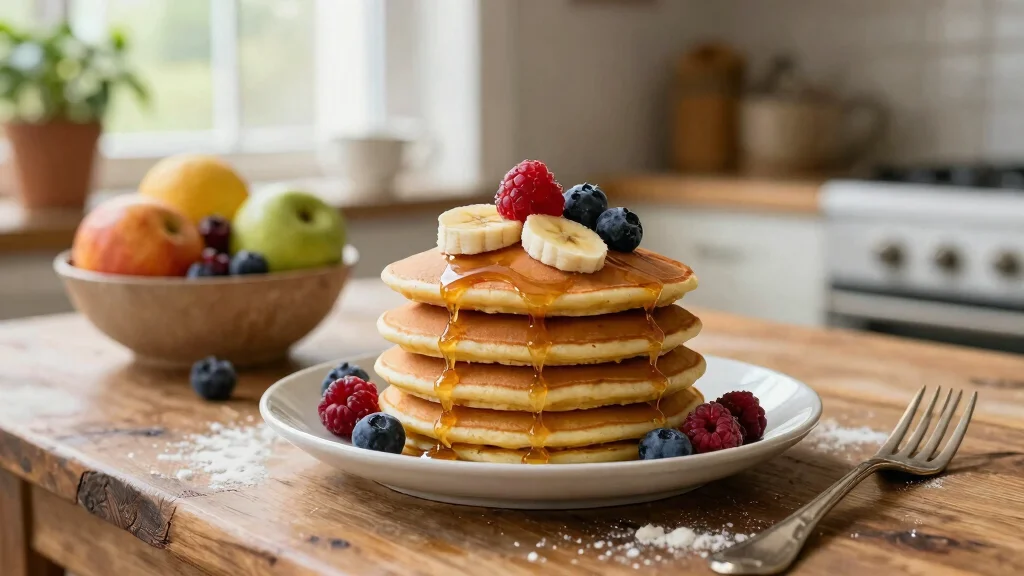
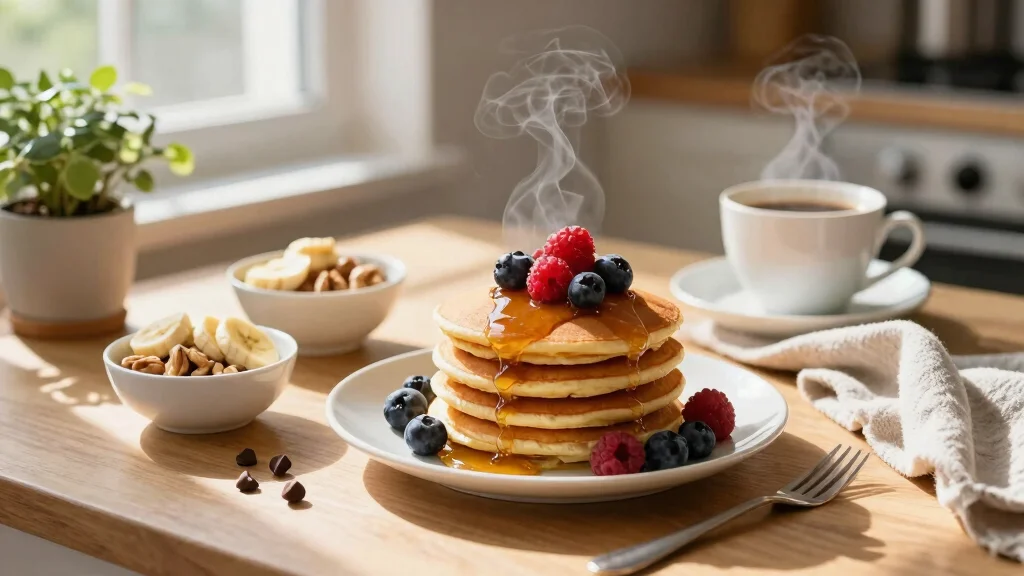
Step 7: Serve Immediately
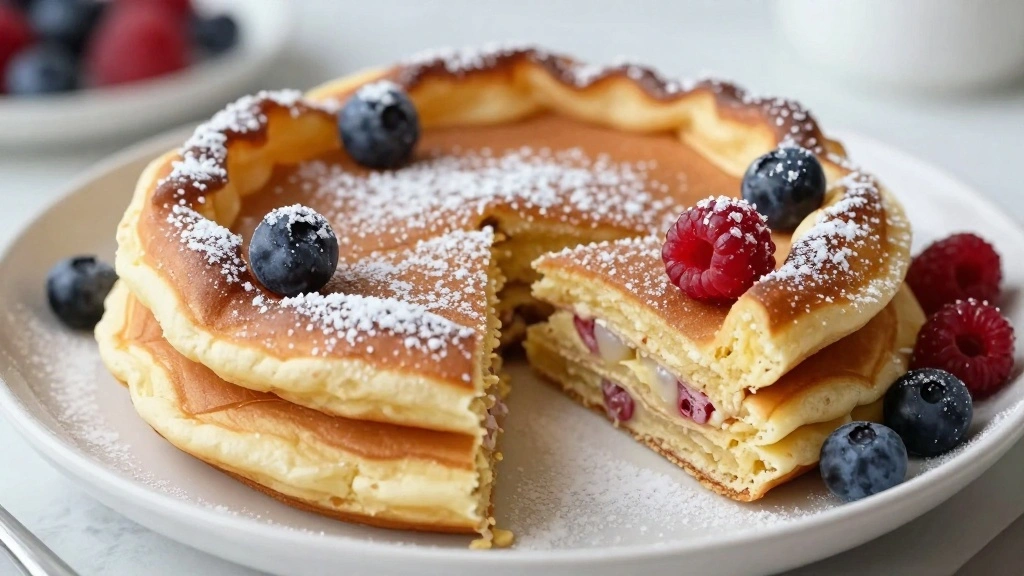
Cut the Dutch Baby into wedges while still warm.
Serve with a dusting of powdered sugar and fresh fruits if desired.
The pancake is best enjoyed immediately for optimal texture.
Offer syrup or lemon wedges on the side for added flavor.


Step 8: Clean the Skillet
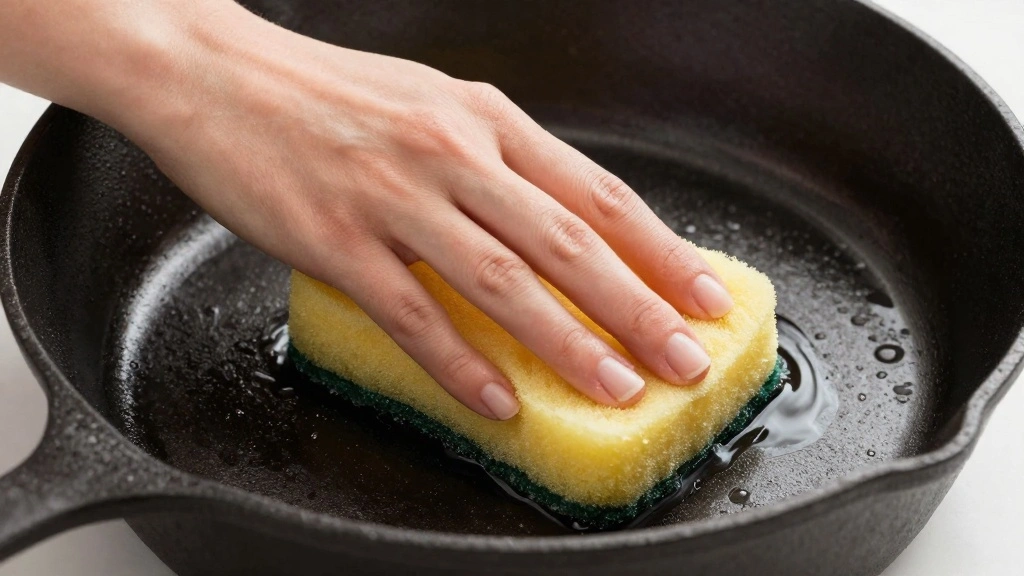
Allow the skillet to cool completely before cleaning.
Use a soft sponge and warm water to clean the skillet.
Avoid soap as it can strip the seasoning from the cast iron.
Dry thoroughly and apply a thin layer of oil to maintain seasoning.
Critical Timing and Temperature Guide
Preheating the Oven: Preheat to 425°F (220°C) for at least 10 minutes. Ensure the skillet is heated with the oven for even cooking. Avoid opening the oven door during preheating to maintain temperature.
Baking the Pancake: Bake for exactly 20 minutes. Look for a golden brown color and a puffed center. Do not open the oven door during baking to prevent collapse.
Cooling the Pancake: Cool for 2-3 minutes before serving. The pancake will deflate slightly, which is normal. Avoid leaving it in the skillet for too long to prevent overcooking.
Pro Tips for Dutch Baby Pancake
• Ingredient Selection: Use fresh, high-quality eggs and whole milk for the best flavor and texture. These ingredients significantly impact the pancake's richness and rise.
• Preparation Secret: Let the blended batter rest for a few minutes to allow bubbles to form, which aids in puffing.
• Temperature Management: Ensure all ingredients are at room temperature to promote even blending and rise.
• Texture Enhancement: Sifting the flour before blending ensures a light and airy batter.
• Flavor Layering: Add a pinch of nutmeg or cinnamon to the batter for a subtle, warm flavor.
• Make-Ahead Strategies: Prepare the batter up to 24 hours in advance and store it in the fridge. Allow it to return to room temperature before baking.
• Restaurant-Quality Finishing Touches: Garnish with a sprinkle of lemon zest or a drizzle of honey for a touch of elegance.
• Equipment Optimization: Preheat the skillet thoroughly to mimic the conditions of a professional kitchen.
Troubleshooting Common Issues
• Pancake Not Puffing: This is often due to a cold skillet or batter. Ensure the skillet is preheated and ingredients are at room temperature.
• Edges Too Crispy: Over-baking or too much butter can cause this. Reduce bake time slightly or use less butter.
• Batter Too Dense: Over-mixing can deflate the batter. Blend just until smooth and bubbly.
• Pancake Deflates Too Quickly: This can happen if the oven door is opened during baking. Avoid peeking to maintain consistent temperature.
• Uneven Cooking: This may be due to an uneven oven temperature. Rotate the skillet halfway through baking if necessary.


Variations and Regional Differences
• German Style: This version uses more eggs and sometimes includes sliced apples cooked in the skillet, offering a denser, custard-like texture.
• Sweet Cinnamon Variation: Adds cinnamon and brown sugar to the batter for a spiced, dessert-like pancake.
• Savory Herb Version: Incorporates herbs like chives and parsley into the batter, served with cheese or smoked salmon.
• Chocolate Chip Twist: Adds chocolate chips to the batter for a sweet, indulgent variation popular in American households.


Food Science Behind the Recipe
• Maillard Reaction: The high heat in the oven promotes the Maillard reaction, which browns the pancake and adds complex flavors.
• Protein Coagulation: Eggs coagulate at high temperatures, providing structure and helping the pancake rise.
• Steam Leavening: The high moisture content creates steam in the hot oven, causing the batter to puff up dramatically.
Frequently Asked Questions
What's the most common mistake people make when preparing Dutch Baby Pancakes? The most common mistake is not preheating the skillet thoroughly, which prevents the pancake from rising properly.
Can I use a non-stick pan instead of a cast iron skillet? While it's possible, a cast iron skillet is preferred for its heat retention and ability to create crispy edges.
Why did my pancake collapse when I took it out of the oven? Some deflation is normal, but opening the oven door during baking can cause excessive collapse.
How can I make my pancake sweeter? Increase the sugar in the batter or add toppings like maple syrup and fresh fruit.
Is it necessary to use whole milk? Whole milk provides richness, but you can substitute with lower-fat milk for a lighter version.
Can I prepare the batter in advance? Yes, store the batter in the fridge for up to 24 hours and bring it to room temperature before baking.
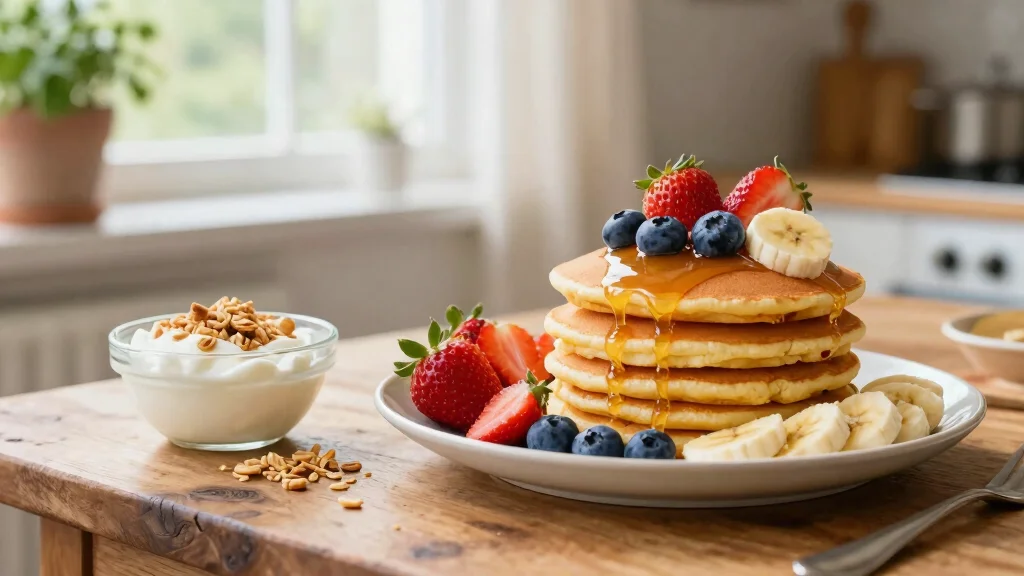
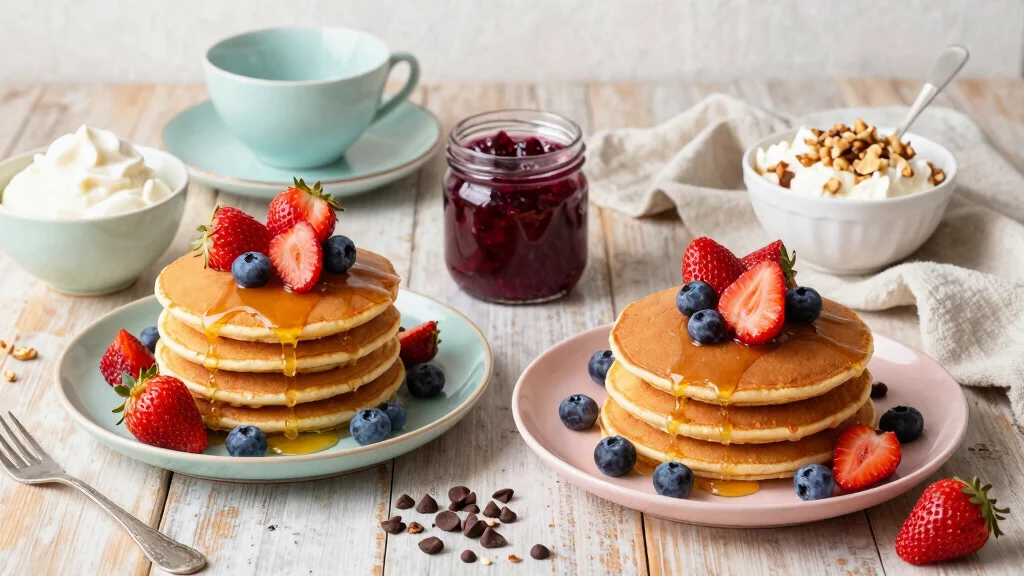
What toppings go best with Dutch Baby Pancakes? Fresh berries, powdered sugar, and lemon juice are classic choices, but feel free to experiment with your favorites.
Serving and Presentation Guide
• Traditional Presentation: Serve the Dutch Baby in the skillet for a rustic, family-style presentation.
• Elegant Plating: Slice into wedges and arrange on a platter with a dusting of powdered sugar and a side of fresh fruit.
• Brunch Buffet Style: Offer a toppings bar with options like whipped cream, nuts, and syrups for guests to customize.
• Individual Servings: Use smaller skillets for personal-sized pancakes, ideal for individual servings or catering events.


Conclusion
With its impressive rise and delectable flavor, the Dutch Baby Pancake is a true breakfast star.
Whether you're a seasoned chef or a kitchen novice, this recipe is both approachable and rewarding.
Try it for your next brunch and watch as it becomes a family favorite.